How To Install A Walk-In Tub?
So you’ve shopped for a walk-in tub, met with several companies, reviewed warranties, affordability, model/feature options and selected your company – now what?
The next phase of your project is the installation itself. Because no two bathrooms are exactly the same, many homeowners have specific questions and concerns about their project. This How-To guide includes a time-lapse video to illustrate the walk-in tub installation process. The additional step-by-step instructions include the important components of a successful installation.
It’s always best to have an on-site survey done with your installer to discuss the details of your unique bathroom layout and situation. After arriving on time, the installers should professionally and respectfully introduce themselves. Likewise, before construction begins, the existing floor in the bathroom should be carefully prepped and covered to avoid damage.
Step 1 - Remove Existing Tub/Shower
- This 1 piece bathtub/shower stall project has a glass door
- Remove the glass door and showerhead
- Use a sawzall saw to cut the current bathtub liner/shell and tub into manageable pieces
- 5-10 pieces is a good baseline
- Remember installers must be able to remove pieces through the bathroom doorway and hallways in the home so individual pieces can’t be too large
- Demolition should be done with the bathroom door closed to minimize dust from spreading into other rooms in the home
Step 2 - Run New Electrical Line
- Find an existing outlet on the adjacent wall to the tub
- Stub a new line into that outlet
- Run a new conduit
- Mount a GFI outlet on the motor of the walk-in tub
- GFI has a surge protector and is sensitive to safety
- GFI has a 12 gauge wire and is rated for a 20 amp circuit
- The motor for this therapy bathtub is pulling 9 amps which is well below the maximum amp capacity
Step 3 - Prep Existing Water And Drain Lines
- Expose the water lines
- Shut off the water outside
- Remove the existing connection to the tub drain and add a new connection
- Reverse plumbing was necessary because the existing faucets were on same side (left) as the toilet which required the faucets to be moved to the right side
- Turn the water back on outside
- Test the connection
Step 4 - Install New Sheetrock On Walls
- Existing bathtub/shower was installed before the sheetrock when the home was built
- Because the original tub 1 piece, including a ceiling piece, all 3 walls and the ceiling needed new sheetrock to make them flush
- Shower wall board is installed on top of the sheetrock for a clean finish
Step 5 - Widen Doorway To Get Tub Into Bathroom
- This project didn’t need the doorway to be widened
- If required, the last step before bringing the walk-in tub into the bathroom is widening the doorway
- Metal doorframes or bathrooms with hi-end tile on the wall surrounding the doorframe can be more difficult to widen
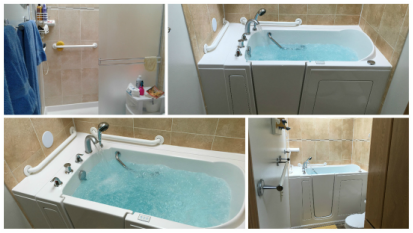
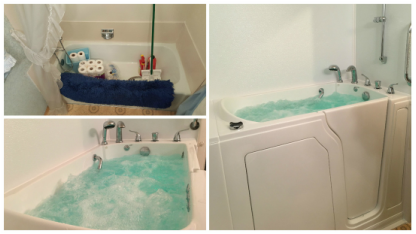
Step 6 - Put Tub In Place And Level Tub
- If demo, electric lines and drain lines were prepared correctly, putting the tub in place shouldn’t be that challenging
- Leveling the tub is done with 6 adjustable leveling legs
- Because no bathroom floor is perfectly level, using a 4 foot level will ensure a perfect fit
- Level in several locations: along the back wall of tub, corner to corner, front to back and across the seat
- When each new location is confirmed level, double check the previous locations for accuracy
Step 7 - Install Extension Kit
- This bathtub/shower stall was 60 inches in length
- Because the longest walk-in tub that fits the standard length is 52 inches, the tub must be turned to fit into the new stall
- The turning radius of a 52 inch tub is 59 inches
- Once the tub is in place, an 8 inch opening remains, in this case, on the left side
- The solution is to install an extension kit to eliminate the gap
- To ensure a perfect fit, the extension kit should be cut to size after the tub is positioned
- The extension kit is actually a pony wall which enables the new bathtub to fit seamlessly in the 60 inch space of the original stall
Step 8 - Finishing Touches
- Install new trim on the walls and the edges of tub
- Caulk/seal all joints as necessary
- Clean the tub and bathroom for the customer
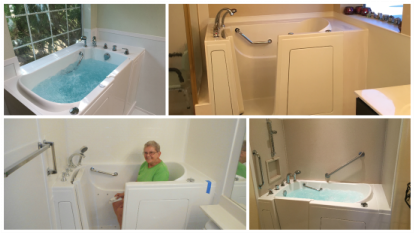
Step 9 - Final Walk Through With Customer
- The installer should test the tub by filling it with water and draining it properly
- The installer should bring the customer into the bathroom and demonstrate how to operate the tub
- The installer should fully inspect the tub and accessories to make sure everything is working correctly
Reminders
- The installer should test the tub by filling it with water and draining it properly
- The installer should bring the customer into the bathroom and demonstrate how to operate the tub
- The installer should fully inspect the tub and accessories to make sure everything is working correctly
Walk-In Tubs should only be installed by licensed contractors and reputable companies. The best installation teams are fully prepared and follow a methodical approach with all phases of every project. Make sure you’re confident in your chosen provider and start enjoying bathing again today.